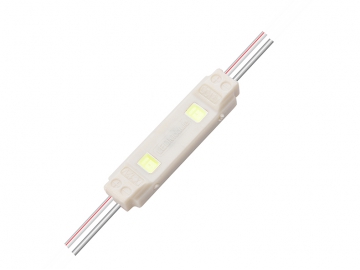
MKX240B(0.36W)


Request a Quote
- Connected with flexible cables
- Type of protection (modules): IP65
- Color rendering index Ra:≥75
- Luminous flux per module chain:22LM
- CE marked
- 3 year guarantee
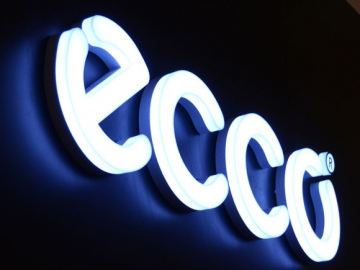
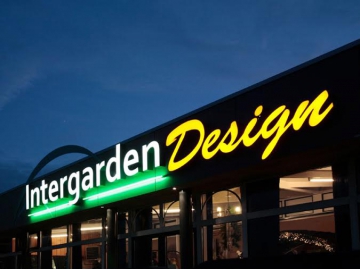
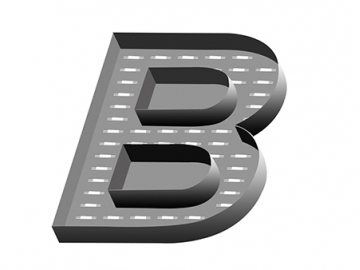
- Suitable for 4-8cm of light box and signage lighting
Features:
- Adopt high bright SMD2835 as light source, low light decay and good color consistency
- Pure white, cool white and red are available
- Using PVC injection molding technology, these lights feature an excellent weather and deformation resistance.
- Fire rating to UL94V-0
Technical parameters:
| Model | LED chip | Light color LED | Color temperature(K) | Nominal voltage( V ) | Power( W ) | Luminous flux | Efficacy nominal(LM/W) | Beam angle | Nominal currentt(mA) | Certification | Color rendering index R(CRI) |
| ( LM ) | ( °) | ||||||||||
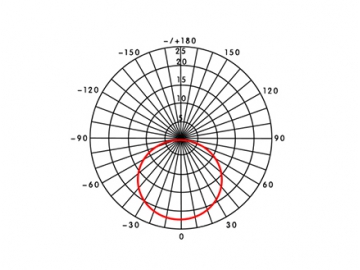
| MKX240B | 2835 | Cold white | 9000-12000 | 12 | 0.36 | 22 | 61 | 120 | 30 | CE RoHS | ≥75 |
| Pure white | 7000-8000 | 22 | 61 | 120 | 30 | CE RoHS | ≥75 | ||||
| Red | 620-650 | 8 | 22 | 120 | 30 | CE RoHS | ≥75 |
Other technical parameters:
| Max daisy chain(PCS) | Color | LED drivers | Weight (g/pcs) | Working temperature(℃) | Temperature(℃) | IP rating (modules) | Dimension | Number of LEDs per module | Warranty period(year) |
| (length*width*height mm) | |||||||||
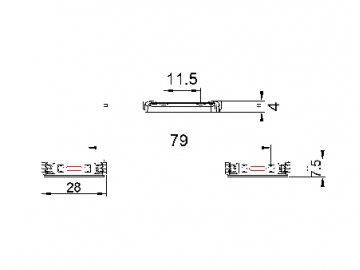
| 20 | White | Constant Voltage | 13 | -25~ 60 | -25~ 70 | IP65 | 28*7.5*4 | 2 | 3 |
Installation or wiring diagram
Installation method: Use PE foam double-sided adhesive and neutral glass adhesive for positioning and fixing.
Cascade can cut, single module can be cut
Installation Instructions:
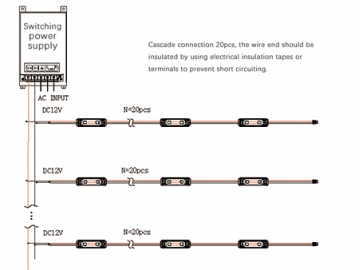
- The main power cable is 2x2.5 mm²or longer. If longer LED Rigid Bar lines are needed, the lamp power must be selected with a wire above 0.75 mm² / 18 # specifications in order to avoid overloading the power cord. Overloading the power cord leads to excessive heat and dangerous consequences. The switching power supply and power cord length straight between the lamp should not be longer than 3 meters. If longer, the line loss increases with an increase in total power.
- Please use the connection diagram in the wiring scheme.
- The screws in the lamp mounting should be inserted straight into the holes and locked into place.
- When the LED Rigid Bar trails have a bare wire conductor, using diagonal pliers, first strip about 10mm of the wire, then screw it into the connection head insulation protection.
- To ensure waterproofing and corrosion protection, after the power line is screwed into the terminals, we recommend an injection of a one-component silicone (or otherwise neutral glass, plastic, or waterproof grease) to cover the bare copper wire power cord for additional protection.
- Do not touch the wire after it is installed, as it is a live wire.
- We recommend a switching power supply with the relevant regulatory certification (short circuit protection, overvoltage protection, overcurrent protection).
Dimension:
Light Distribution Curve:
Connection diagram:
Related products
")
")
")

Send Message
Most Recent


More
")


Other Products


